Thursday, October 4, 2012

Leave Those Pruners Alone


As fall sets in, and our plants start to look tired, we gardeners go into clean-up mode.  First, we clean out our vegetable gardens, putting plants with diseases and insects into the trash or burn pile and clean plants into the compost bin.  Then, we may start to rake up a bit.  The combination of cooler weather and sunshine just invites us to spend the rest of the day outside and so we start to look around for other tasks.  Often we go get the pruners and do a little trimming.  But is fall the best time to do that?  I argue that it is not.  In the fall your plants are about to go into dormancy, and pruning them can stimulate a flush of new growth at the wrong time.  This depletes the plants’ reserves of energy for the spring flush, and leaves open wounds at a time when frost is quickly approaching. 

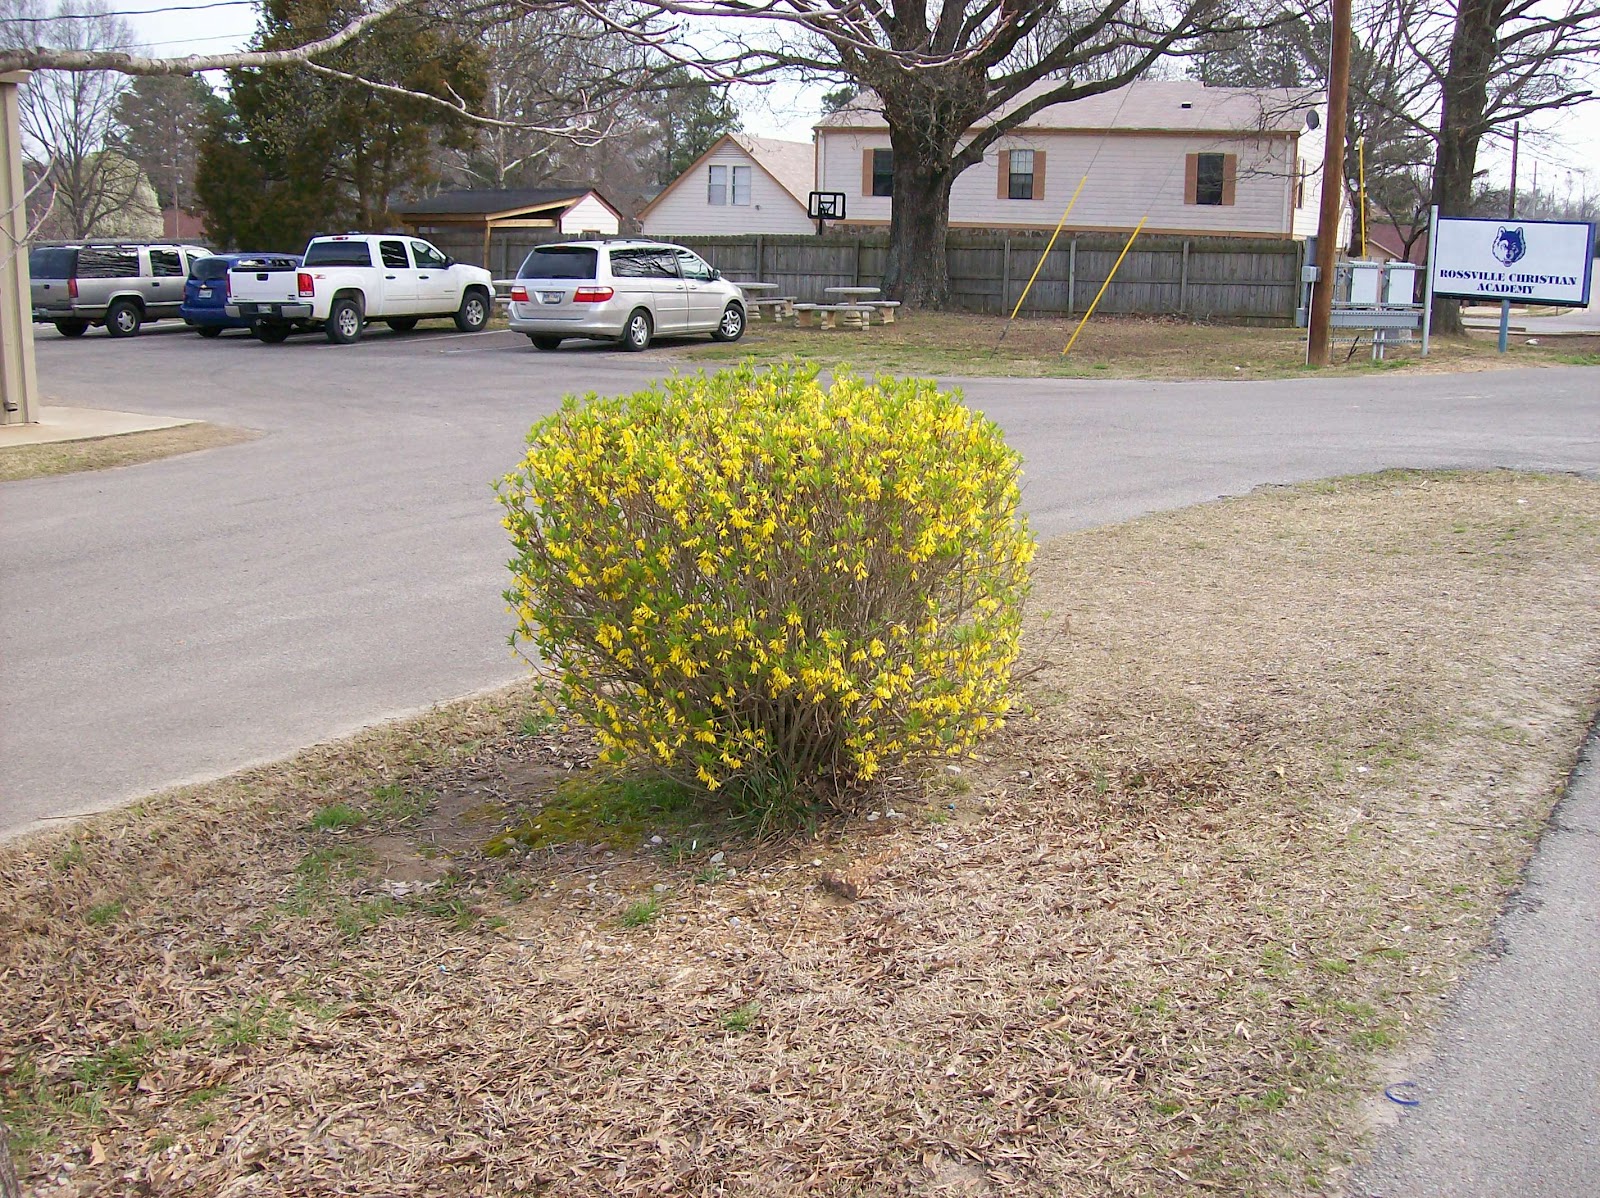
Additionally, many people give their crape myrtles a severe pruning in the fall after this summer’s blooms have faded.  They usually do this for one of two reasons, either to ensure lots of blooms for next summer or to tame a tree that has outgrown its space.  While it is true that crape myrtles bloom on new growth, you do not have to prune in order to get blooms the next year.  The plant will put on new growth all by itself in the spring, and flowers will initiate from that growth.  If you have a crape that has grown to the point where its limbs whack you in the face when you mow around it or walk next to it, prune judiciously.  Try just taking off the offending limbs on the underside of the canopy and allowing the tree to grow up and over that sidewalk.  Still, this type of pruning should wait. Crape myrtles have a beautiful growth habit or shape when left to look natural.  Even the dried seed pods left on them in the winter add some ornamentation to a bleak landscape. 
 
Seed pods on crape myrtle

So, when should we prune?  I recommend late winter and early spring.  In late winter many of the plants will be dormant and you will be better able to see the branching structure.  In spring, the plants will be actively growing and can recover quickly from pruning.  For early spring bloomers, such as azaleas, it is best to prune them immediately after they are finished with their flowers.    To get more information on pruning or any other horticulture question you may have, give me a call at the Extension office, 901-465-5233.  UT Extension offers its programs to all eligible persons regardless of race, color, national origin, sex, age, religion, disability or veteran status and is an Equal Opportunity employer.


Wednesday, August 29, 2012

4-Hers Learn to Grill

This past weekend, five Fayette County 4-Hers participated in the Outdoor Meat Cookery Contest in Jackson, TN.  They had all spent the last few weeks learning how to grill with charcoal and planning out their theme.  The grilling contest, as we like to call it, is maybe the most fun 4-H contest to participate in because all of the training sessions consist of the kids hanging out with other 4-Hers and eating what they cook.  The contest is also very competitive.  There were around 90 4-Hers there on Saturday grilling. 

Where there is smoke, there is fire!
 

We had a high school team as well as a junior high individual who competed.  Teams are made up of four kids who all must grill something different.  One grills pork, one grills chicken, another youth grills beef, and still another grills lamb.  They have to do this start to finish, on separate grills, with no help or coaching from any adult.  They each grill two pieces of meat.  One piece goes to to the judges for taste testing and the other goes on the team platter for theme judging.  Any side dishes they put on their theme table has to be grilled as well.

This year, the Fayette County 4-Hers chose Native American Cooking as their theme.  Here they are with their table and platter.

 
 Left to Right:  Victaven Murrell, Jessica Brewer, Logan Laine, Rachel Wilson, and Marah Williams


Looks delicious!!
 
Logan Laine, our Jr. High individual contestant, won third place for his delicious chicken!  We were all very proud.  If you would like for your child to learn how to safely grill with charcoal, then give me a call at the Extension office.  We teach this skill every summer and would love to have  your family take part. 

Thursday, August 2, 2012

Gardening by the Numbers


Get out your calendars and your seed packets, because it’s time to plant your fall garden!  I know, it feels way too hot outside to even think about fall, but pretty soon you will be craving those fresh mustard greens.  So, if you have space in your garden from your played-out summer veggies, consider replanting with broccoli, cauliflower, collards, lettuce, mustard, radish, spinach, or turnips. 

The fall garden isn’t without its challenges.  You will have to deal with heat, water stress, insects, and weeds while you wait for cooler temps to arrive.  To cope with these issues, you should plant your seeds at the latest possible date that you can.  That is where the calendar comes in.  Start with the average first frost date for our area.  In Bolivar, the date is October 8.  In Brownsville, the date is October 11.  Next, look on the seed packet and see how many days from planting to maturity are expected.   Add ten days to that number to account for cooler weather and shorter days in the fall.  Subtract the total number of days required for the plant to grow from the date you want it to begin maturing to find the latest planting date. Keep in mind that kale, collards, and other cool season veggies can withstand some frost, and can mature two weeks after the frost date. 

For example, collards can take 65-75 days to mature.  They can also withstand a frost.  Let’s assume that Somerville’s frost date is October 9.  Two additional weeks allowed for frost-resistant veggies puts us at Oct. 23.  Remember, we need to count backwards 75 -85 days to account for the cool fall weather we eagerly anticipate.  So, that puts our planting date for collards at August 8.  That is really soon!  So, don’t procrastinate just because it’s hot and it feels like fall is never coming.  Get out there and use up that open space!  Come October, you will be glad you did!  

Friday, July 27, 2012

Herb Gardening Can be Delicious!

Home-grown tomatoes in the summer...  You just can't buy that flavor in a store.  I enjoy a tomato and mayonnaise sandwich as much as anyone else, but I also love to pair those tomatoes with fresh basil from my garden.  If you  buy fresh herbs at the grocery store, you know how expensive that can get. So, growing your own can save money too!   


Herbs like full sun, and can be grown in containers, in landscape beds, or in the veggie garden.  Rosemary, thyme, lavender,  dill, fennel, and savory are indigenous to the Mediterranean and prefer dry, lean soil in full sun.  Basil, tarragon, parsley, and allium like more water and richer soil.  Keep in mind the different water requirements when deciding where to plant your herbs.  Also, you should know that the proper time to plant annual herbs in our area is in the spring after April 15.  One exception is cilantro.  Cilantro is a cool season herb and should be planted by seed on Valentine's Day or later.  


Some commonly grown annual herbs (that have to be re-planted each year) include: cilantro, basil, parsley, dill, and stevia.  Chives, fennel, lavender, Rosemary 'Arp', oregano, mint, sage, and thyme are perennial.  However, we had such a mild winter this year that basil reseeded itself in my garden. 


They are all nearly insect and disease free. The only problem with insects I've ever had was with parsley.  Caterpillars ate every leaf on the plant.  However, those caterpillars turn into  beautiful black swallowtail butterflies, so I am o.k. with that.  


If you are thinking about growing herbs, but you aren't sure how to use them, I recommend going to a website such as allrecipes.com.  You can type an ingredient such as "fresh basil" into the search box, and it will pull up all the recipes that contain that ingredient.  Hopefully, you will consider adding them to your garden and your plate next spring. 


Tuesday, July 3, 2012

Gardening in a Drought

Wow, has it been dry lately!  Here are some ideas to help you make it through. 

Prioritize Your Watering

If you only have a few minutes to devote to hose dragging each day, then focus on the most drought susceptible spots and let the rest go.  The must-water list includes the following:
  • The vegetable garden- Sure, they can survive with little water, but you will be sacrificing food.
  • Annuals- Ever seen floppy impatiens? 
  • Container plants- Container plants tend to dry out faster -- especially terra cotta pots.
  • Newly planted trees, shrubs, and perennials- Their root systems aren't developed enough to make it through a drought.
  • New or recently repaired lawns- You spent too much money on that sod to let it croak!

Conserve Water

There are also a few things you can do to get the most out of your watering:
  • Water in the morning to prevent loss to evaporation.
  • Decrease fertilizers.
  • Don't prune your shrubs.
  • Water deeply and less often.
  • Mulch your plants.

Plan for the Next Drought

Consider installing a rain barrel to help you conserve water for the inevitable next drought.  Did you know that up to 623 gallons of water can be collected off of a 1,000 square foot roof from a one-inch rain?  That is a LOT of water!  You could be saving some of that water to use on your plants.  There are many ready-made barrels for sale at stores, or you can make your own.  Tennessee Yards and Neighborhoods has an excellent article on rain barrels with instructions.  I have a small 35 gallon rain barrel at my house, and I love it.  It even collects condensation from the air conditioning unit, so it refills very quickly whether it rains or not.  I use it to water all my annuals, containers, and newly planted perennials. 

In the meantime, keep praying for rain!

Perennial Foxtail in Hayfields Part 3

By Jeff Via


This perennial foxtail, aka knotroot foxtail, Setaria parviflora is a beast of a weed!!! More and more calls are coming in, after many folks discover they have it. We even had a producer in Georgia call the other day. Not sure if you have this type of foxtail? Well, it’s easy to identify, this perennial has fibrous roots with short, knotty rhizomes (picture below). Apparently as stated in one of the previous blogs, a species shift from the more easily controlled grass weeds, to a predominance of knotroot foxtail has occurred in many fields.


This year, many producers applied a dormant spray of paraquat or glyphosate or a combination of one of those with pendimethalin at varying rates. The fields that had the higher rates of pendimethalin showed better suppression of the seedling perennial and annual foxtail. Other fields had both perennial and seedling foxtail coming up after a glyphosate/pendimethalin treatment. Not sure the reason why the seedlings came up but this was probably due to too much rain. Rain is needed to activate the pendimethalin but not too much. One thing to note, the pendimethalin will do nothing to the perennial foxtail plants already in the field.

Since only a limited amount of research has been conducted in states south of Tennessee (where knotroot foxtail is more prevalent) with results showing that even the most effective treatments (Pastora or Pastora plus glyphosate) only providing suppression of the weed. To date, no treatments have been identified that provide complete control.

In a normal year, our recommendations would be to apply a dormant spray for winter weeds and then apply Pastora at 1.5 oz./acre + glyphosate (8 oz./ acre of a 4 lb./gal. product or equivalent) with a non-ionic surfactant at 1 qt./100 gal. 3-5 days after first cutting for knotroot foxtail suppression. This treatment could then be followed by 1 oz./acre Pastora or Pastora plus glyphosate10-14 days later if the weeds try to recover.

With the warmer than normal temperatures this year and the rapid early growth of the foxtail, troublesome fields needed to be treated prior to first cutting. We decided to treat fields with the perennial foxtail when they reached 8-10 inches in height. In many of these fields, seedlings were coming up as well.

Since only a limited amount of research had been conducted in states south of Tennessee (where knotroot foxtail is more prevalent) and the results show that even the most effective treatments (Pastora or Pastora plus glyphosate) only provide suppression of the weed. We decided to do some research in state.

 On March 28, 2012, Extension agents in Fayette and Shelby County along with help from BASF put out a research plot targeting perennial foxtail. This plot was located in a field where the perennial foxtail pressure was heavy.  The field was treated with varying rates of pendimethalin (Prowl H2O) (1.5 qts., 2qts. and 4qts.); the plot was conducted where 2 quarts of Prowl H20 was applied along with glyphosate as a dormant spray.  Go to our website to see  the treatments applied to the plot:

The remainder of the field was sprayed with Pastora at 1.5 oz. plus 8oz. of the 4lb./gal. glyphosate plus a surfactant at 1 quart/ 100 gal. After monitoring the plot/field, we rated both for injury and suppression/control to see how the different applications affected the perennial foxtail.  Ratings were conducted on April 13, 2012.  The table on our website contains the ratings.

The producer had reduced growth and discoloration of the bermudagrass following the applications but was aware of this ahead of time and knew this was part of the process to suppress the perennial foxtail. This was temporary and the bermudagrass recovered.

The field/plot was fertilized on 4/19/2012 with 80-20-40 and then cut for hay on 5/20/2012. On 5/25/2012 the producer applied Pastora at 1.0 oz. plus 8oz. of the 4lb./gal. glyphosate plus a surfactant at 1 quart/ 100 gal. to the field leaving out the plot.

On 6/12/2012, again with help from BASF, the plot received its second shots.  See the website for treatments applied to the plot:

After monitoring the plot/field, we rated both again for injury and suppression/control to see how the different applications affected the perennial foxtail.  Ratings were conducted on June 26, 2012 (Table 1 above).
The above listed treatments are experimental and not labeled for use in hayfields with the exception of Plateau. UT’s recommendation again, is a dormant spray of paraquat or glyphosate or a combination of this with pendimethalin followed by Pastora at 1.5 oz./acre + glyphosate (8 oz./ acre of a 4 lb./gal. product or equivalent) with a non-ionic surfactant at 1 qt./100 gal. 3-5 days after cutting. Then Pastora at 1.0 oz./acre + glyphosate (8 oz./ acre of a 4 lb./gal. product or equivalent) with a non-ionic surfactant at 1 qt./100 gal. 10-14 days later if the weeds try to recover. This treatment is subject to change depending on the year. This year was one we had to tweak.
After reviewing the data from the plot and the field, we were able to get roughly 85% suppression and the farmer was pleased. More research will continue the remainder of the year and again next year.

Friday, June 29, 2012

The Birds and the Bees for Vegetable Gardeners

Occasionally I have gardening friends who tell me they have blooms everywhere in their gardens, but little fruit.  Sometimes it helps to know something about how that particular plant is pollinated. 

For instance, did you know that members of the cucurbit family, which includes squash and cucumbers, have seperate male and female blossoms on the same plant?  That is why you will never have all of your squash blossoms producing fruit.  The males are unable to, of course.  Most always, the plants put on many male flowers for a couple of weeks before ever making a female flower with the potential for pollination.  Often times gardeners think that something must be wrong with their plant because they have so many blooms and no cucumbers. 

When you do get both male and female flowers on the plant at the same time, they are usually bee pollinated.  A flower usually has to be visited by a bee six or eight times before good pollination occurs.  If you aren't noticing many bees, and are concerned that pollen isn't getting transferred, you can always assist nature by using a cotton swab to move the pollen from the male flower to the female flower yourself.  It is pretty easy to tell which flowers are which.  The female flowers have a tiny immature fruit at the stem of the flower.  The male flowers don't.  Also, you can tell by looking in the center of the bloom. 

Squash blossoms are also edible!  There are tons of squash blossom recipes on the internet, and now that you know which flowers are which, you can fry up your excess male flowers without worrying that you are taking away a potential fruit!  The photos below show the inside of the female and male squash blossoms.

Female squash blossom


Male squash blossom

At my house, I have a cucumber plant that must have 50 or 60 male blossoms, but only one female.  So, I will just have to keep waiting until nature takes its course.


Thursday, May 17, 2012

What's the Problem?


I recently got a phone call from a lady concerned that her trees had a disease.  She said that the disease left holes all over the trunk of her apple tree and now had started attacking her maple. 

I didn’t think this was going to be a disease issue because apples and maples aren’t close relatives.  Usually diseases are more specific than that. 

So, as I had suspected, her disease has feathers!  A woodpecker called the yellow bellied sapsucker pecks distinctive holes in almost straight lines on the trunks of trees.  Fortunately, trees usually can withstand the damage.  As you can see from the photo, once the sapsucker gets a tree on his mind, he stays focused on it for a while.  You can try to repel the birds by hanging a small, concave shaving mirror in the tree.  Also, they may be scared away by strips of aluminum foil 1"x12" hung from strings so that they twist in the wind. 


Thursday, May 10, 2012

Flowers and Fun


Yesterday I had such a great time at the hand tied bouquet workshop!  The five ladies that attended were too much fun!  You could hear the laughter throughout the office as we swapped stories while we worked on our flowers.  At the end of the session, we had to take a picture of us all lined up like we were bridesmaids.  The bouquets turned out great and the ladies were fast learners.  Everyone got to take home their masterpiece of orange and yellow 'Circus' roses, lime green spider mums, hot pink carnations, purple alstromeria, and bear grass. 

Thursday, May 3, 2012

Bountiful Blueberries


Wow!  It has been almost a month since I last blogged.  When I was thinking of what my next topic would be, I had a lot to choose from.  Well, a home visit yesterday sealed the deal.  I went to look at some blueberry bushes.  They were totally loaded with berries, not quite ripe.  The gentleman told me he had picked 5 gallons of berries the previous year, and wanted to make sure all was well with his shrubs, as he had noticed some twigs die back.  It turns out that he has nothing to worry about, his shrubs are quite healthy and were just showing signs of water stress.  As I was daydreaming about vanilla ice cream topped with fresh blueberries, I decided the next  blog post would be dedicated to how to grow them.

Blueberries are a perennial shrub that can get 10-12' high, if left unpruned.  They have very few insect and disease problems.  In fact, the biggest concerns with growing them are providing adequate moisture and beating the birds to the fruit. 

There are two types of blueberries:  Rabbiteye and Highbush.  Rabbiteye is native to the southern U.S. and Highbush is native to the north.   Therefore, Rabbiteye can take heat and drought better than Highbush.  They still need mulch and and water while getting established, but will not need irrigation throughout the growing season like a Highbush would in our area.  The recommended varieties of Rabbiteye for West TN are Tifblue, Climax, Gardenblue, Southland, Bluebelle, and Brightblue.  You need to plant at least two different varieties to get cross-pollination.

Blueberries need a well-drained soil with a low pH.  So, the first thing you should do is a soil test.  You can pick up a soil test kit and instructions from any Extension office in any county in Tennessee.  There is a $7 fee, but the test results will tell you what your pH is and exactly what to do if you need to use sulfur to lower it.  Additionally, the results give you instructions for how much fertilizer you need as well.  Blueberries should be planted November through March, and you will need to do your soil test well in advance, as it takes several weeks for the pH of a soil to change after adding the sulfur. 

The shrubs should be planted in rows 5-6' apart.  When working the planting holes, mix 2 gallons of wet peat moss with the soil removed from the holes and place in the bottom of the hole.  This will help to keep the roots moist.  After planting, be sure to mulch 4" deep to help conserve water as well.  Then, it's a waiting game.  It takes 3-4 years for your first good yield.  However, you could always collect enough for that ice cream in the meantime!

Tuesday, April 10, 2012

Preventing Problems in the Vegetable Garden


Benjamin Franklin once said, “An ounce of prevention is worth a pound of cure.” That statement definitely rings true in the garden.  There are lots of simple things you can do this growing season to prevent insect and disease problems on your vegetables. 

This year when you buy seeds or transplants, make sure to buy disease resistant varieties whenever possible.  Also, inspect the transplants for any warning signs.   Check over them for insects.   Look under the leaves and in the axils- the area where the leaves connect to the stems.  Reject any transplants that look sickly or have any spots on the leaves.  Leaf spots are generally an indication of a fungal disease problem. 


When you lay out the garden, be sure to practice crop rotation.  Rotating crops is one of the best and easiest disease prevention strategies we have.  Many diseases are specific to a particular family of plants, so when you rotate between the families, the cycle of disease can be broken.  Dividing your garden into four sections and rotating the crop families to a different one each year for four years is an easy way to do it.  Common families include the legumes (peas and beans), the cucurbits (squash, pumpkins, muskmelon, watermelon, watermelon, and cucumber), the crucifers (cabbage, cauliflower, broccoli, kale, collards, turnips, mustards, and radish), and the night shades (potatoes, peppers, eggplants, and tomatoes).

Consider mulching your vegetables this year.  If mulch is good for you landscape plants, it will be good for your vegetables too.  Mulch prevents weeds, water loss, and the spread of diseases from splashing water.  You can use any organic mulch you want such as leaves, straw and grass clippings.  Just apply a 2-3” deep layer on top of the soil surface. 

For continuing protection through the summer, remove struggling plants.  Don’t try to nurse an ailing tomato plant along.  Struggling plants are an open invitation for diseases and insects.  It is better to pull up one plant than to risk inoculating the whole lot. 

Why not try one of these strategies?  It could save you time and money in the long run.  May you have a  bountiful harvest this year! 


Thursday, April 5, 2012

Update on Perennial Foxtail in Hayfields

County Director Jeff Via is back as a guest blogger this week with an update on his work with Perennial Foxtails. 

Jeff Via


Last week, on March 28, 2011, Extension agents in Fayette and Shelby County along with help from BASF put out a research plot targeting perennial foxtail.  The plot is located on a field that was treated with varying rates of pedimethalin (Prowl H2O) and conducted  where  1.5 quarts of Prowl H20 was applied along with  glyphosate as a dormant spray. 

Since a limited amount of research has been conducted in states south of Tennessee (where knotroot foxtail is more prevalent) and the results show that even the most effective treatments (Pastora or Pastora plus glyphosate) only provide suppression of the weed. We decided to do some research in state.

Pastora at 1.5 oz. along with different rates of glyphosate was applied to the field.  We are also looking at other experimental herbicides.  We will be monitoring and spraying the plot again with Pastora and glyphosate next week and will see how the different applications are affecting the perennial foxtail.  At 1.5 qts. of Prowl H2O, the seedling foxtail are emerging everywhere.  See picture below.


 On the date that the research plot was conducted, the perennial foxtail was 8-10 inches in height. In a normal year, as already mentioned in the previous blog, our recommendation would be to apply a dormant spray for winter weeds and then apply Pastora at 1.5 oz./acre + glyphosate (8 oz./acre of a 4 lb./gal. product or equivalent) with a non-ionic surfactant at 1 qt./100 gal. 3-5 days after first cutting for knotroot foxtail “suppression”. This could then be followed by 1 oz./acre Pastora or Pastora plus (8 oz./acre of a 4 lb./gal glyphosate or equivalent) 10-14 days later if the weeds try to recover.

 With the warmer than normal temperatures this year and the rapid early growth of the foxtail, troublesome fields need to be treated now.

 Producers can expect reduced growth and discoloration of the bermudagrass following applications of Pastora or Pastora plus glyphosate. This is temporary and the bermudagrass will recover. Remember according to the Pastora label we cannot apply more than 2.5 oz./acre per season.

The agents in Fayette and Shelby County were called out and visited a field on April 3, 2012 where 4 quarts of Prowl H20 was used in combination in the dormant spray.  The seedling foxtail was suppressed at this rate and at this point.  However, the perennial foxtail  is starting to put out  seed heads.


Recommendations at this time are to use 1.5 oz. of Pastora with (8 oz. of 4lb./gal. glyphosate or equivalent) with a surfactant at 1 quart/ 100 gal.  Depending on your perennial foxtail pressure, 10-14 days after that, apply 1 oz. Pastora with (8oz. of 4lb./gal. glyphosate or equivalent) and surfactant.  We will be monitoring the research plot and make recommendations as the season progresses.

 Pastora also has on the label that it can be applied in a 50-75 percent liquid N spray solution or with ammonium sulfate. The producer we visited with had some concerns with the Pastora and its recovery. With this being said, we recommended that he use the recommended rates above in the liquid N or with the ammonium sulfate after talking to a DuPont representative.

 With that said, University of Tennessee research has shown that the liquid N does reduce injury but may be impractical if the grower is not set up for this. Regarding the ammonium sulfate, University of Tennessee research has shown that it did not reduce injury. As is the case with all agricultural chemicals, be sure to read and follow label directions and precautions.

Tuesday, April 3, 2012

Jr. Gardeners Construct Plant Corsets

The Junior Master Gardener 4-H Club recently met at the garden of Vivian England, one of our 4-H volunteers.  Mrs. Vivian showed the kids the wonders of spring hiding right under the leaves from last fall still in her flower beds.  She explained that she keeps the fall leaves in the beds all winter long on purpose- to provide insulation to her perennial flowers.  The kids gently removed the leaves from a portion of the beds to find small, tender plants waiting for the warmth of spring.  Some of the plants were volunteering back from seeds dropped by last year's annuals.  Others were coming back from perennial rootstocks and bulbs. 

Mrs. Vivian also taught them how to make plant corsets for perennials that will get too tall and will need to be staked up off the ground later in the growing season.  The kids made their supports using crapemyrtle twigs and cotton twine.  I have always liked the look of natural materials in the garden for supporting flowers.  The more natural, the less obtrusive the stakes are to the eye as you take in the beauty of the flowers. 

First, the kids laid the twigs down on the ground in a row, and tied them to each other at the bottom of the corset.


Next, the corset is stood upright and a spiderweb like support system is made near the top.


Now all that is left to do is cut the bottom of the corset with pruners into points so that it can be stuck into the ground over your perennial.  As the plant grows, you simply weave it through your spiderwebbing to keep it upright.


Thursday, March 22, 2012

Today I welcome the Fayette Co. Extension Director, Jeff Via as a guest blogger.  Jeff works with rowcrop farmers and livestock producers.  He has recently been working on perennial foxtail in pastures. 


Perennial Foxtail Confirmed in Hayfields  -Jeff Via

For some time, Extension Agents have preached that properly managed pastures and hayfields can provide much of the feed needed for livestock (horses and cattle). We taught that when well-managed, theses forages can provide an inexpensive, high quality feed. Poorly managed pastures and hayfields on the other hand, are unattractive and could potentially be the cause of some health/nutritional problems.

While controlling grasses in a grass hayfield has been an issue for many, it wasn’t until a couple of years ago, a few agents started receiving calls on hard to control foxtails. At this time a fairly new product had surfaced called Pastora (Nicosulfuron+metsulfuron). Pastora is a premix of the active ingredients in Accent and Escort herbicides.

Using rates of 1 oz./acre gave good control when applied overtop to control johnsongrass, broadleaf signalgrass, barnyardgrass, fall panicum, foxtails and many broadleaf weeds.

Now, producers in many cases, were doing what we at UT recommended but these well-managed hayfields were looking poorly managed. This had producers, Extension Agents and chemical representatives scratching their heads, making many trips to producer’s fields and causing apprehension about using some of the products we recommended.

Foxtail was one of the biggest concerns for hay producers and buyers due to the ulcers that some horses got if they consumed hay containing it (look at picture).


In many fields, Pastora and Pastora/Glyphosate gave limited control of foxtail. It was not until about a month ago that knotroot foxtail, Setaria parviflora a perennial foxtail was found in abundance in hayfields in Fayette and Shelby counties. Easy to identify, this perennial has fibrous roots with short, knotty rhizomes (look at picture). 


Many producers have applied a dormant spray of paraquat or glyphosate or a combination of one of those with pendimethalin at varying rates. The fields that had the higher rates showed better suppression of the seedling perennial and annual foxtail to date. Other fields had both perennial and seedling foxtail coming up after a glyphosate/pendimethalin treatment. Not sure the reason why the seedlings came up but probably due to too much rain. Rain is needed to activate the pendimethalin. One thing to note, the pendimethlin will do nothing to the perennial foxtail already in the field.

To date, the perennial foxtail is 8-10 inches in height in many fields with seedlings coming up as well. In a normal year, our recommendation would be to apply a dormant spray then apply Pastora at 1.5 oz./acre with 8 oz./acre Glyphosate 4 lb. product with a non-ionic surfactant at 1 qt./100 gal. 3-5 days after cutting. This would then be followed by 1 oz./acre Pastora 10-14 days later and depending on the problem, add more glyphosate.

With the warmer than normal temperatures, our recommendation today is the same as above but earlier. We are recommending folks apply Pastora at 1.5 oz./acre with 8 oz./acre Glyphosate 4 lb. product with a non-ionic surfactant at 1 qt./100 gal. when the foxtail is about one foot tall, which in some places will be about one week. Follow this with 1 oz./acre Pastora 10-14 days later and depending on the problem, add more glyphosate. Remember according to the Pastora label we cannot apply more than 2.5 oz./acre per season.

Monday, March 12, 2012

In Praise of Daffodils


Daffodils...they are so common that they are often taken for granted, yet they give and give while expecting very little in return. 

I have decided that what my yard needs is more daffodils.  I currently have a small clump that was given to me by my friend Jennifer, and the blooms are petite, yellow and lovely.  I just need more of them.  I love the way some people have them planted in drifts on hills or near the road at the entrance to their driveways.  They are quintessentially spring.

There is so much variety in the world of daffodils!  According to the American Daffodil Society's website, there are thirteen different descriptive divisions of daffodils, and over 25,000 named hybrids.  Today I visited Vivian England's yard and was delighted to find the flower in the photo- white with a peachy trumpet.  Vivian is quite the daffodil collector with at least 50 different varieties growing on her hillside.  She told me that the cardinal rule of daffodil growing is to never cut the foliage off the plant until it yellows.  After flowering, the plant absorbs the nutrients in the leaves and stores it in the bulbs for food for the next spring's blooms.  Cut off the foliage too early, and you limit your flower potential for next year. 

Happily, daffodils are very easy to grow and can take full sun or part shade-like under a deciduous tree.  They don't mind being mulched and don't have to be divided every year.  They should be planted in late fall to early winter, which gives me plenty of time to decide which ones I want to add to my yard for next year.  Did I mention they make excellent cut flowers as well?  I may have to move some iris to make more room for daffodils!

Friday, March 9, 2012

Don't Bury the Burlap

Last week I went out on a home visit to look at some evergreen trees that were planted last spring.  The home owner was a bit concerned because they looked very orange and had shed a lot of needles.  I have to admit, if they were my trees, I would have been worried too. Here is what they looked like:

The funny thing is that the plants were greener on the South facing side.  Also, on the North side, which this picture shows, the undersides of the needles were greener than the topsides of the needles.  I asked her about her water regimen.  She watered with a soaker hose during the summer.  She also told me that the landscaper planted them with the burlap still on. 

So, I had a pretty good idea at that point what was wrong. 

There were 2 common misconceptions at play here. 

  1. The first is that it is ok to leave burlap on at planting because burlap will decompose.  Well, yeah, eventually.  But in the meantime that burlap is a barrier to water getting to the root system, and a barrier for the roots to be able to spread out and anchor the plant.  
  2. The other misconception is that you don't have to water plants in the winter.  While it is true that plants typically need less water in the winter, that is not the case with newly transplanted material.  Additionally, TN has received less than average rainfall this winter.  We are in a water deficit. 
Ok, but how did I explain one side looking better than the other, and one side of the needles looking worse than the other?  I asked the plant pathologists in Nashville for their opinion as well.  They confirmed what I had suspected.  Winter burn from the wind was obviously going to be worse on the North side, and the orange side of the two-colored foliage was facing the direction of the prevailing winds.    So, their recommendation was to check the soil for moisture a foot deep, and water thoroughly if dry.  As for the orange color, that should green up as the plant recovers from moisture loss and the air temperature rises in the spring.  In fact, I drove over there again yesterday and the trees were starting to look better already! 


Wednesday, March 7, 2012

Put Away the Power Tools


 Today on my way back from 4-H clubs in Rossville, I was delighted to see forsythia blooming all over the place.  What a beautiful shrub with such a graceful growth habit!  How lovely a few limbs would look in a vase in my living room!  Forsythia is such a cheerful plant, one of the first assurances of the coming spring.  Reminds me of my Grandmother's yard every time I see them. 


Then, I saw this... 


I am sure that whomever wielded the weapon had no idea what type of shrub he (or she) was encountering.  I am certain that he was simply sent on a mission:  go prune stuff at the school.  We can only hope that the perpetrator will return soon so that he/she can see the forsythia blooming in a box, and be rehabilitated. 

While I am on the subject, there are other plants that should never be touched with a power tool.  This would include azaleas and crepemyrtles.  Friends, we have to stay diligent and choose our landscape service providers with care.  

Tuesday, March 6, 2012

Fruit Tree Demo

Today we hosted a pruning demonstration for fruit trees.  It was held in Jeff Windom's backyard.  Jeff is a Master Gardener in our county who has first hand knowledge about pruning fruit trees.  You would be absolutely amazed at what he has done with a small suburban backyard.  His lot has no topsoil, as it was scraped off when the house was built.  Today he told me that he once did a percolation test by filling a hole with water to see how long it took to drain.  He said the hole still had water two weeks later! To make up for this, he grows his veggies in either raised beds or containers, but the fruit trees are planted directly in that soil without anything added to the planting hole.  He has well over 35 fruit trees back there plus a small veggie garden.  Did I mention it is all on a slope?  If I were to have bought a house on a lot like that, I would have been tempted to despair.  What could you possibly do with a sloping backyard with terrible soil?  Well, as it turns out, a lot!

 Mainly he is interested in peaches and apples and he grows over 30 different varieties of fruit trees. 
All of his fruit trees are pruned to stay short enough so that he can work them without climbing up and down a ladder.  They are also pruned using either the central leader system for apples, or the open vase shape for peaches.  He even has a small spray rig which he hooks up to his riding lawn mower so that he can control insect and disease problems.  His boxer, Gracie, is his orchard manager.  She oversees the work and does quality control testing on any fruit on low-hanging branches.  Today she followed Jeff all around the grove, standing by his side as he explained all about their trees and the care that is involved with them. 

Jeff is very knowledgeable and did a great job.  There was a good turnout as well as you can see from the photos. 


Gracie takes a break